Thursday, 30 May 2013

A Gray Knit Top


The year I found my husband was the year I had to wear business suits to work.

The fashion world of business wear was introduced to me. On one hand these clothes were considered professional enough for meetings and office work, but also the clothes were just stylish.

I have a whole collection of business wear sketched and eventually (maybe in a few years!) I'll be able to make it all!

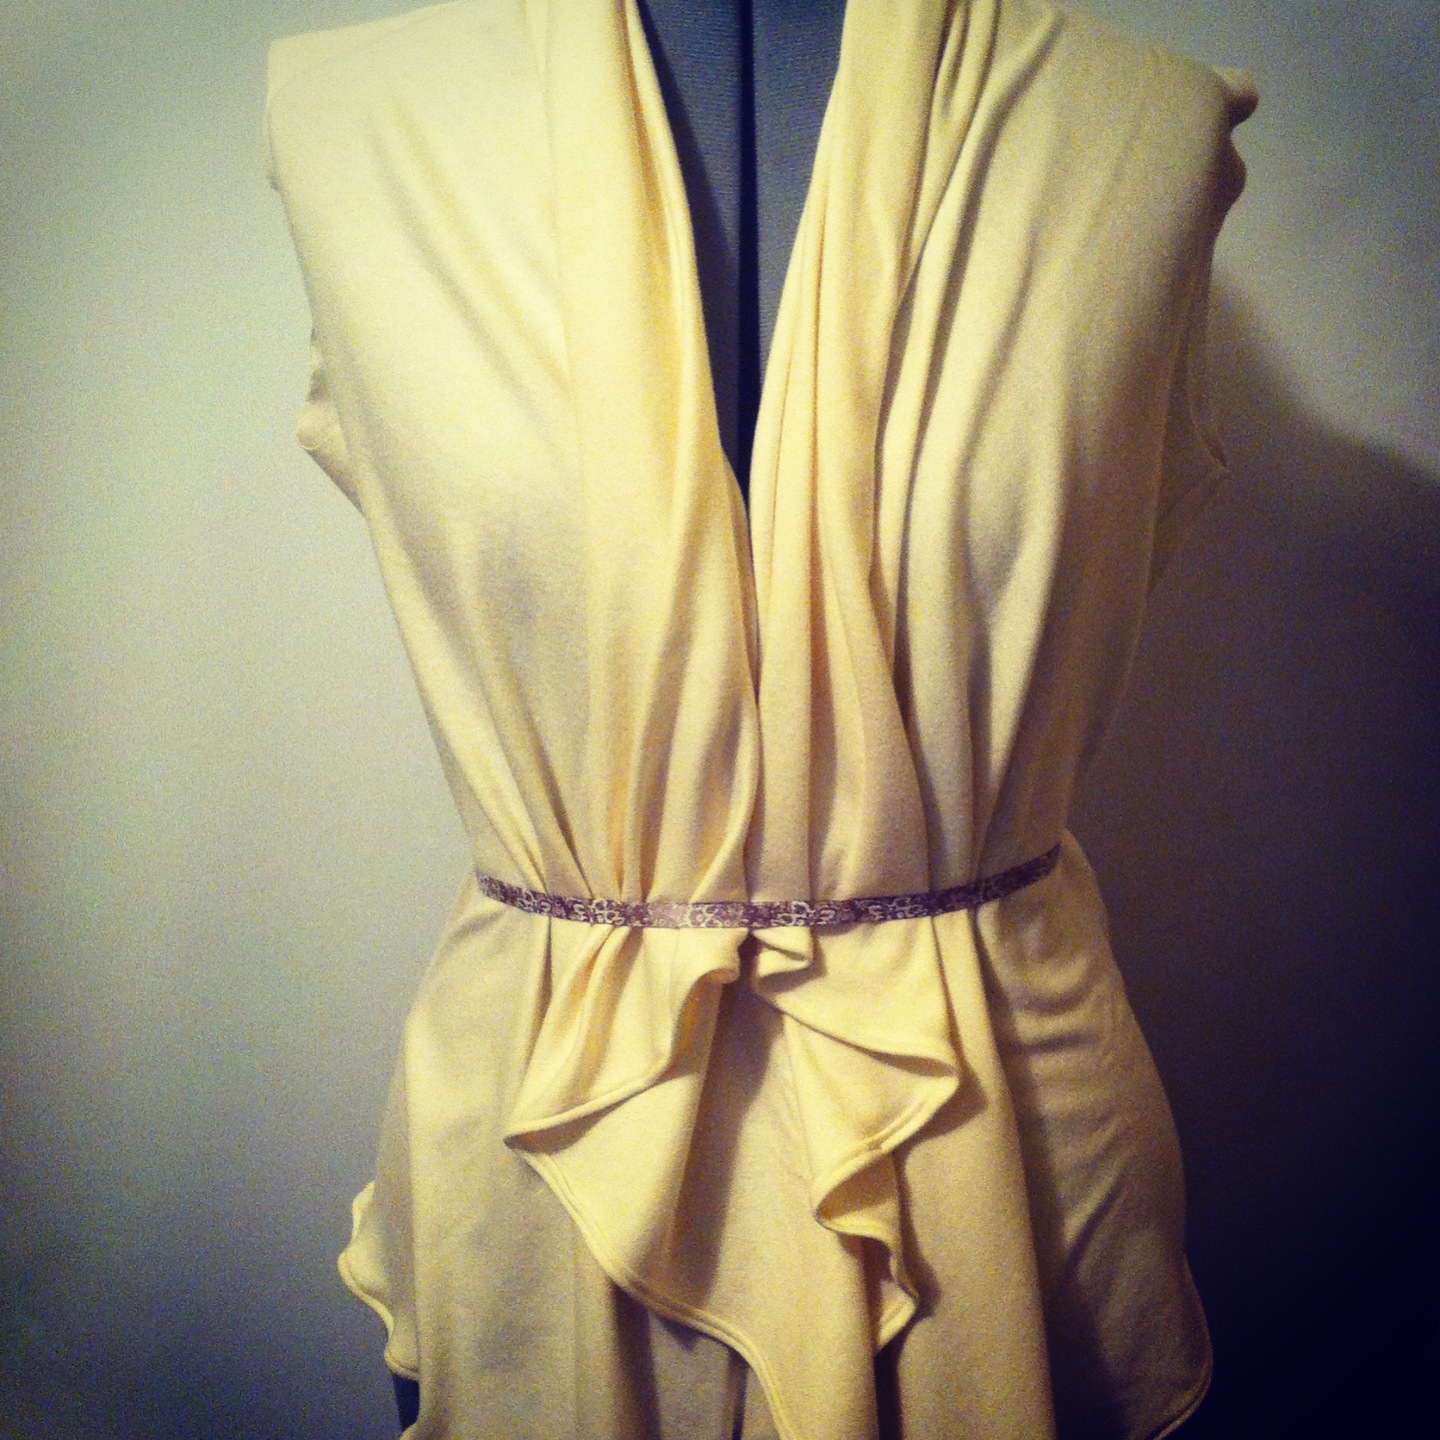
Here is my first piece in gray.


I used this pattern, same as the previously posted cardigans, but changed a few things:


I used the back pattern for the back and part of the front. For the front, I left extra fabric around the shoulders and neck to figure out the pleats. Once it was draped and pinned in place, I cut the fabric straight on the mannequin.

I used the sleeve pattern, but widened the sleeves for more a belled/kimono look.

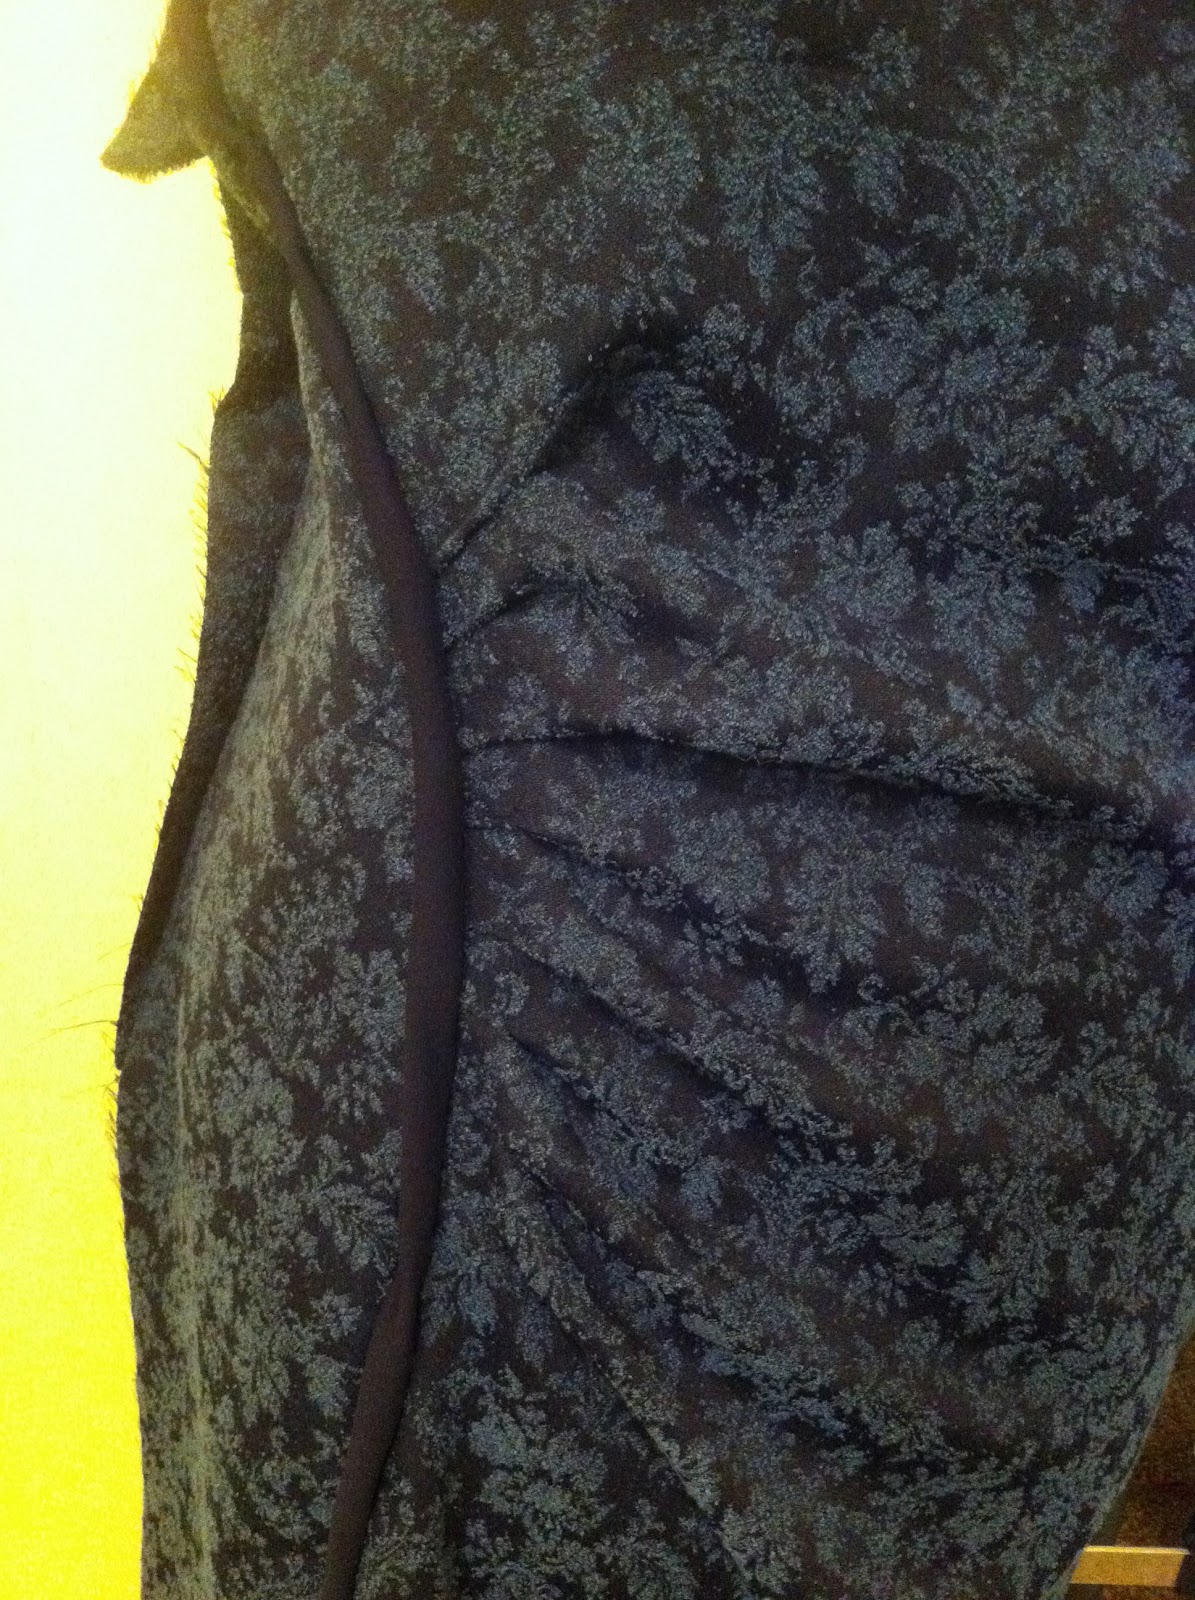
And for the back keyhole and buttons, I used another top I had from my closet as a reference.

The fabric is knit and I watched these two videos for tips:

Part 1:
http://www.youtube.com/watch?v=ZEOjwcI5M9U

Part 2:
http://www.youtube.com/watch?v=XfwKTUay6UA

Originally I had thought to simply gather at the neckline, like this:


But I just couldn't do it with this knit, maybe it's too thick?

I thought adding the decorative button in the middle was cool and I wouldn't need to bother with a necklace.


This top has a mock turtleneck with a keyhole in the back and snaps. I used this $1 top from Goodwill as my guide for the keyhole.


I already cut the buttons off and put them in my button jar :) I noticed on another pattern that snaps can be used, so I went that route.


Okay so I struggled with the back bit but considering its my first time making this, I figured it's not too bad and really, does anyone look at seams when talking to people? I'll hopefully do better next time.

Gray is neutral and I love wearing it with silver and orange accessories.

This is definitely an autumn/winter piece of clothing so I will tuck it in my closet until then!

Thanks for stopping by!

xx

Tuesday, 28 May 2013

Infinity Scarves


Infinity scarves hit the store shelves a few years and they are brilliant! 

I finally got around to making a few.

I have seen different cotton blends and knits for these scarves, but I chose chiffon. 

I also read a few tutorials who say to get 2 yards of fabric. Really? I got 1/4 yard. In my head that equals a 1/4 of the price! 

Anyhow, I followed this tutorial on the sewcreativeblog which was super easy to understand and making these really takes no time at all!

I made three so far, one was a gift for a friend....


I did learn a few things.

If you are lazy like me and decide to use whatever is plugged in, you may end up with this:


A seam so big you can see it through your thin scarf! So I redid that one.

Another thing, after I straight stitched the two sides together, I used these pinking scissors to help with the unravelling:


Overall I am quite happy with the end results.

I realised the last few weeks I have become autumn-minded working with knits and making scarves, maybe because of the cold spell that has recently hit us? Who knows but I am glad they both match my fall jacket perfectly!


Thanks for stopping by!

xx

Saturday, 25 May 2013

A Cream Cardigan


Back in February I made a red cardigan. 

This is using the same pattern but in a lighter cream knit fabric.

It is something for those chilly summer nights. 

I love how simple and quick it is to make!


Thanks for stopping by!

xx

Tuesday, 21 May 2013

A Japanese Kimono


I have been wanting to make a kimono for a hundred years. 

I love them. They are so comfortable and look good on everyone!

Someone had asked why I had such an obsession with Chinese and Japanese dresses- the cheongsam (also known as qipao) and kimono.

Perhaps I could say that maybe it is because I have ancestral origins from both places. I could also say that I love how both styles are modest with their sleeves. But to be honest, I don't know. I just do! 

I found this fabric that I thought was pretty and interesting. However it was also see-through so I bought a black stretchy fabric for the lining. 

FUTURE NOTE TO SELF- Unless for a winter dress, don't use such a thick lining! It was a pain.

Kimonos are simple and extremely varied. I wanted easy, easy, easy. Only 6 pieces. 12 if you include the lining pieces.

This fabric has both stripes in its texture as well as the gentle floral print. I cut a few pieces of the actual fabric before I cut the muslin to see how the stripes would work. Then I knew the direction of the pattern.


Then muslin.

Front


Back


I used three inches of (unstretched) elastic to shape the bust.


I finished the top in a matter of hours. See how the v-neck is supposed to line up with that triangular waist shape? The sewing machine was okay but to make it really nice and tight and stay in its proper place, I hand sewed that.


After some fittings and tweaking a few other things, finally done!

I am still learning so its not perfect but it fits pretty good and is comfortable!


Now that this one is finally done, I am excited to start another project today!

Thanks for stopping by!

xx

Birds and Flowers Fabric Bunting


I still have bunting fever. I just love them!

This fabric is a bit unusual and I think it is so cool.


A little bit of bird makes me think of being free. Let your wings soar.

A little postcard stamping here and there reminds me of all the letters I have received from friends around the world.

The collage represents (for me) how random, and yet beautiful, life can be.


Flowers, who doesn't love flowers? God's adornments on the Earth.

The colours are bright and happy. 

The bunting has rough edges. Sometimes I feel like I do too, but I hope others will see the good in me.


Another bunting and this will be going to a special friend as a gift. (I hope she likes it!)

Thanks for stopping by!

xx

Saturday, 18 May 2013

Monster Face Knees!


Years ago on Pinterest I saw a cute way to mend those holes at the knee. I remember thinking I wanted to cut a hole in my son's jeans just so I could make a monster face!

The opportunity finally came. He wore out these cargo pants enough for me to make a simple monster face.


It was quick, simple and fun!

Just using some thick interfacing, a zig zag stitch and a sharpie marker.


1. Turn pants inside out. Trim excess thread.
2. Close the hole as much as you can.
3. The side of the interfacing with glue dots should be on the fabric.
4. Your iron should be hot. Hold down for about ten seconds. Make sure you get those corners.

Then I sewed a green zigzag with my sewing machine.

I have seen others that used felt to make the face but I just used the interfacing for the teeth and eyes. Ironing it on.

UPDATE: the interfacing does not last. I am getting some felt for next time...

I hand sewed in some blue hair.

Not so detailed as some others that I have seen but my Ethan liked it and that's all that matters really.


Thanks for stopping by!

xx

Wednesday, 15 May 2013

Sesame Street Pillow

A while back I had made a bandana pillow for little Axel. I should have made two! I need to always think in twos but hey, I'm human and don't always realise or think.

So instead of another bandana, I decided to make a pillow of the sesame street fabric I had. Luckily Axel still prefers his and Ethan LOVES his!

What three year old wouldn't love this BRIGHT thing! hahaha

I did the exact same thing as before. 

Using the pillow cover as the lining, cut/sew, stuff and finish. 

I love how fast and easy pillows are to make!


I have also been doing a bit of what I call "admin sewing". Those things that need done but really aren't that fun to mention. Fixing PJ seams, hemming more jeans, making rice hot packs, altering dresses, but it all takes time. 

I continue towards my goal of learning all about dressmaking, which is very time consuming but also fun and exciting! Will post again soon!

Thanks for stopping by! 

xx

Saturday, 4 May 2013

Etro Designer Knock-Off Chinese Dress


Have you heard of the Italian designer Etro? I first heard of her when I worked in a really posh department store 7 years ago and have since been following her collections on the style.com app.  

I absolutely love Chinese dresses, so when I saw this beauty in her Fall 2010 collection, I always knew I would someday make my own version of it!


Several weeks ago I went fabric shopping with my mother-in-law and fell in love with this vintage looking navy blue floral fabric. I instantly knew I would pair that fabric with the above Etro design!


I am not a dressmaker. I am learning! This is only the second dress I have made so far. This post is NOT a tutorial, but rather my go-to when I choose to make another one! A lot of it may make no sense because it won't be in chronological order either. Sorry but I am a beginner and only trying to teach myself dressmaking. I am just documenting this as a reference. 

MAKING THE PATTERN

Drape muslin over mannequin. Draw the desired design. Cut.
Use other patterns for help on armholes and necklines, and collars.


PLEATS

Decide which of these looks best for the design effect.


A. Pleats by hand
B. Shirring
C. Elastic underneath
D. Gathering option on serger

I pinned and repinned those pleats for days and days! Big ones, smaller ones, lots of pleats and less pleats, one side or both sides, it all makes a huge difference to the overall look.


Note to self: Muslin was totally different than the actual dress fabric. It looks, lays and gathers in its own way. Re-pin your pleats.

This also gives an idea of how much fabric is needed in the pattern.

Tip: mark the pleats.


And then match with pins.


COLLAR AND INTERFACING.

Do a practice run on muslin first. Watch this video for a tutorial.

Need interfacing on collar and across chest where snaps will be later hand-sewn. The interfacing needed is described on a chinese dress pattern.

Measure neck so it's not too big! Your neck may be different from the mannequin's.


SEAMS

Constantly check seams and seam allowances.
When piecing together, be sure they are laying in the same direction so it doesn't cause a bump.
Some seams need serged before sewn together.
Seams are important DETAILS for a clean finish.

CUT FABRIC.


START OVER!

(I am so sorry this room has yellow walls. And the lighting is awful. But you get the jist yes :)

DETAILS

Sew a quick seam to hold pleats in place. Then sew about an inch into the seam to hold it down and make it more seen.


I used a bright blue thread when sewing the pleats just in case I wanted to redo them, and its a good thing because I did undo some! To cover it up, I will use a sharpie marker! Hey, it works!

Below: The pointed seam combining the blue bands. Tuck the longer one underneath, then serge the other seam with the blue band that has interfacing.

Blue band going across chest needs finished edges.


KEEP IT SIMPLE

Ruffled skirt, blue band and side skirt all layered and serged.


MISTAKES

Are okay!
This fabric frayed really easily and it is only my second dress. There were holes that needed mending, just hand sew.


Remember that even the greatest of inventors made a lot of mistakes before figuring out what they needed to do to make things work. And of course practice!

DARTS

There are two small darts on the back.
This was a good link. 

SNAPS

I watched this easy video tutorial on how to hand sew snaps. This dress has five across the chest on the blue band. It was super fast and easy!


BOTTOM HEM

When everything was absolutely done, lay dress across quilting measuring board, measure and cut. Finish off the hem with serger and stitch.


TAKE A BREAK.

I always feel rushed to get things done asap. I'm learning to take my time and enjoy the progress of each new step I learn.

Finished!

This took three weeks worth of nap times from start to finish. I can finally relax! Until I start my next project!


Thanks for stopping by!

xx